Showing posts with label Problem Solving. Show all posts

Wednesday, 8 October 2014

Remove an Operating System from Boot Menu

If you have more then one operating system installed or wish to remove an operating system from the boot menu, you can use the following information.

1. Click on Start, Control Panel, System, Advanced.
2. Under Startup and Recovery, click Settings.


Screenshot

3. Under Default Operating System, choose one of the following:

"Microsoft Windows XP Professional /fastdetect"

-or-

"Microsoft Windows 7 /fasdetect"

-or-

"Microsoft Windows 8 /fastdetect"


4. Take the checkmark out of the box for "Time to display a list of Operating Systems".
5. Click Apply and Ok, and reboot the system.

Saturday, 21 June 2014

Change the CHKDSK countdown time

When you schedule CHKDSK to run at the next boot, the system will prompt you to press a key to cancel the operation while CHKDSK is running. The system will display a countdown during that cancel period. The default value is 10 seconds.


To Change this open up Regedit and locate:

HKEY_LOCAL_MACHINE\SYSTEM\CurrentControlSet\Control\Session Manager\AutoChkTimeOut

You can change the value to anything from zero to 259,200 seconds (3 days). With a timeout of zero, there is no countdown and you cannot cancel the operation.

>>Thanks for reading this blog.. also Share this

Friday, 6 June 2014

Speed up Mozilla FireFox


To Speed up Mozilla Firefox use the following steps:-
--------------------------------------------------------------------------------


Firefox Logo

1. Type "about :config" in the adress field.
2. Set the value of network.http.pipelining to "true".
3. Set the value of network.http.pipelining.maxrequests to "100".
4. Set the value of network.http.proxy.pipelining to "true"
5. Set the value of nglayout.initialpaint.delay to "0" (not availible in newer versions)

>>www.moneysrofficial.blogspot.com

Wednesday, 11 September 2013

Improve Dial Up Modem Performance

You can't assume that just because you connected at a speed like 48.3KBps that you will stay there. Today's modems automatically fall back to a lower speed if the line noise is too high to maintain a faster connection, but sometimes they fall back too soon or too far.


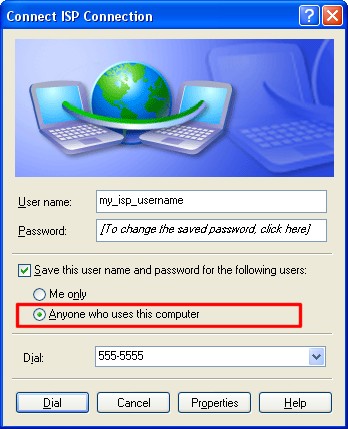
Dial Up Screen


Here's how to do it:
  1. Click Start the button.
  2. Select Settings.
  3. Click Control Panel.
  4. Double-click on the Modems icon.
  5. Select your modem.
  6. Click the Properties button.
  7. Click the Connections tab.
  8. Click the Advanced button.
  9. In the "Extra settings" field, type S36=7
  10. Click OK to save your settings.

This will force your modem to try to stay connected at high speeds in two different ways before dropping back to an asynchronous mode with auto speed buffering.

Thursday, 11 April 2013

MTNL Connection Checkup

1. Verify physical connectivity

Connect all Peripherals as per instructions. Do not connect any device on telephone line before the splitter box for proper working of broadband service.


2. Verify the LAN and Wireless settings

a). For LAN go to Network Connections and check local area connection is enable and TCP/IP Properties settings in PC, use the following IP address 192.168.1.2 to 254 and Gateway 192.168.1.1 (In case of Using USB Cable with UT-300R2UTKD Modem, IP address 192.168.1.3 to 34 Gateway 192.168.1.2) and DNS Server Address as: Preferred DNS (Primary) 59.179.243.70 and Alternate DNS (Secondary): 203.94.243.70

b). For Wireless go to Network Connections check Wireless connection is enable and view wireless network check network SSID connect, TCP/IP Properties settings in wireless card, use obtain an IP address automatically and DNS Server Address as: Preferred DNS (Primary) 59.179.243.70 and Alternate DNS (Secondary): 203.94.243.70

3. Verify Connectivity between PC and ADSL CPE - Perform the following PING test

In the command prompt, type ‘ping 192.168.1.1’ and press Enter. Confirm that you are getting reply from 192.168.1.1.If the reply is not received, it indicates connectivity problem between PC and ADSL CPE.

4. Verify connectivity Internet Network – Perform the following PING test

In the command prompt, type ‘ping 59.179.243.70’ and press Enter. If the reply is received, connectivity is ok otherwise check CPE setting.

Monday, 11 March 2013

Fix CD-ROM driver problem

If your CD-Rom is not visible in windows explorer and gives error code 19 then it is a driver problem when windows cannot load driver from the system for the hardware device. This problem may be occur cause of driver corruption or registry corruption, if it is a driver corruption then try to update driver otherwise lets fix this problem with Apps-Blogger+
1. Click on Start --> Run --> and type in 'regedit' followed by the enter key ( if Vista,7,8 then Start > Search or windows+R )
2. Expand the "HKEY_LOCAL_MACHINE" key (looks like a folder) by double clicking it (or
3. Click "+" next to it.)
4. Expand the "SYSTEM" Key
5. Expand the "CurrentControlSet" Key
6. Expand the "Control" Key
7. Expand the "Class" Key
8. Please look for a key containing the following string of letter and numbers:
{4D36E965-E325-11CE-BFC1-08002BE10318}
9. High light this key by left clicking once on it
10. On the right hand side you are looking for "UpperFilters" and "LowerFilters" under the "Name" column, once you find these please delete them by right clicking on them and choosing "delete"
11. Please exit the registry by clicking on the "X" in the top right hand corner of the screen

Now, Reboot your computer and use your CD-Rom
For Free Manish Apps Softwares goto www.manishapps.wix.com/mapps

Monday, 28 January 2013

Repair Windows XP without Installation CD

It is very annoying when our Computer is running on the Operating System whose files are corrupted and many times shows an Error message and make us Frustated and leaving us with none other option than Re-installing the Windows. But this is not the solution we an also Repair it. But what if do not have the Installation CD.
Don't be worry, here is the solution on Apps-Blogger+. Just follow these steps:-
  • Click on Start >> Run >> Type "webfldrs.msi" ( without quotes ).

Webfldrs.msi Window
  • Now follow the Instructions.and select Re-install Mode.
  • Now Check all the options on the New Screen which appears and click OK.
  • Now Click Re-install button finally and it would take few minutes depending upon the System Conditions.
  • Now after it Restart the Computer and it is done.

Tuesday, 22 January 2013

Beep Codes

AMI BIOS Beep Codes

Below are the AMI BIOS Beep codes that can occur. However, because of the wide variety of different computer manufacturers with this BIOS, the beep codes may vary.

1 short - DRAM refresh failure
2 short - Parity circuit failure
3 short - Base 64K RAM failure
4 short - System timer failure
5 short - Process failure
6 short - Keyboard controller Gate A20 error
7 short - Virtual mode exception error
8 short - Display memory Read/Write test failure
9 short - ROM BIOS checksum failure
10 short - CMOS shutdown Read/Write error
11 short - Cache Memory error
1 long, 3 short - Conventional/Extended memory failure
1 long, 8 short - Display/Retrace test failed


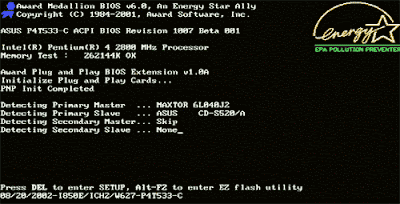
Energy Star Bios Startup Screen

AWARD BIOS Beep Codes

Below are Award BIOS Beep codes that can occur. However, because of the wide variety of different computer manufacturers with this BIOS, the beep codes may vary.

1 long, 2 short - Indicates a video error has occurred and the BIOS cannot initialize the video screen to display any additional information
Any other beep(s) - RAM problem.

Note: If any other correctable hardware issues, the BIOS will display a message.

IBM BIOS Beep Codes

Below are general IBM BIOS Beep codes that can occur. However, because of the wide variety of models shipping with this BIOS, the beep codes may vary.

No Beeps - No Power, Loose Card, or Short.
1 Short Beep - Normal POST, computer is ok.
2 Short Beep - POST error, review screen for error code.
Continuous Beep - No Power, Loose Card, or Short.
Repeating Short Beep - No Power, Loose Card, or Short.
One Long and one Short Beep - Motherboard issue.
One Long and Two Short Beeps - Video (Mono/CGA Display Circuitry) issue.
One Long and Three Short Beeps - Video (EGA) Display Circuitry.
Three Long Beeps - Keyboard or Keyboard card error.
One Beep, Blank or Incorrect Display - Video Display Circuitry.


Macintosh Startup Tones

Error Tone (two sets of different tones) - Problem with logic board or SCSI bus.
Startup tone - drive spins, no video Problem with video controller.
Powers on, no tone - Logic board problem.
High Tone, four higher tones - Problem with SIMM.


Phoenix BIOS Beep Codes

Below are the beep codes for Phoenix BIOS Q3.07 OR 4.X

1-1-1-3 Verify Real Mode.
1-1-2-1 Get CPU Type.
1-1-2-3 Initialize system hardware.
1-1-3-1 Initialize chipset registers with initial POST values.
1-1-3-2 Set in POST flag.
1-1-3-3 Initialize CPU registers.
1-1-4-1 Initialize cache to initial POST values.
1-1-4-3 Initialize I/O.
1-2-1-1 Initialize Power Management.
1-2-1-2 Load alternate registers with initial POST values.
1-2-1-3 Jump to UserPatch0.
1-2-2-1 Initialize keyboard controller.
1-2-2-3 BIOS ROM checksum.
1-2-3-1 8254 timer initialization.
1-2-3-3 8237 DMA controller initialization.
1-2-4-1 Reset Programmable Interrupt Controller.
1-3-1-1 Test DRAM refresh.
1-3-1-3 Test 8742 Keyboard Controller.
1-3-2-1 Set ES segment to register to 4 GB.
1-3-3-1 28 Autosize DRAM.
1-3-3-3 Clear 512K base RAM.
1-3-4-1 Test 512 base address lines.
1-3-4-3 Test 512K base memory.
1-4-1-3 Test CPU bus-clock frequency.
1-4-2-4 Reinitialize the chipset.
1-4-3-1 Shadow system BIOS ROM.
1-4-3-2 Reinitialize the cache.
1-4-3-3 Autosize cache.
1-4-4-1 Configure advanced chipset registers.
1-4-4-2 Load alternate registers with CMOS values.
2-1-1-1 Set Initial CPU speed.
2-1-1-3 Initialize interrupt vectors.
2-1-2-1 Initialize BIOS interrupts.
2-1-2-3 Check ROM copyright notice.
2-1-2-4 Initialize manager for PCI Options ROMs.
2-1-3-1 Check video configuration against CMOS.
2-1-3-2 Initialize PCI bus and devices.
2-1-3-3 Initialize all video adapters in system.
2-1-4-1 Shadow video BIOS ROM.
2-1-4-3 Display copyright notice.
2-2-1-1 Display CPU Type and speed.
2-2-1-3 Test keyboard.
2-2-2-1 Set key click if enabled.
2-2-2-3 56 Enable keyboard.
2-2-3-1 Test for unexpected interrupts.
2-2-3-3 Display prompt Press F2 to enter SETUP.
2-2-4-1 Test RAM between 512 and 640k.
2-3-1-1 Test expanded memory.
2-3-1-3 Test extended memory address lines.
2-3-2-1 Jump to UserPatch1.
2-3-2-3 Configure advanced cache registers.
2-3-3-1 Enable external and CPU caches.
2-3-3-3 Display external cache size.
2-3-4-1 Display shadow message.
2-3-4-3 Display non-disposable segments.
2-4-1-1 Display error messages.
2-4-1-3 Check for configuration errors.
2-4-2-1 Test real-time clock.
2-4-2-3 Check for keyboard errors
2-4-4-1 Set up hardware interrupts vectors.
2-4-4-3 Test coprocessor if present.
3-1-1-1 Disable onboard I/O ports.
3-1-1-3 Detect and install external RS232 ports.
3-1-2-1 Detect and install external parallel ports.
3-1-2-3 Re-initialize onboard I/O ports.
3-1-3-1 Initialize BIOS Data Area.
3-1-3-3 Initialize Extended BIOS Data Area.
3-1-4-1 Initialize floppy controller.
3-2-1-1 Initialize hard-disk controller.
3-2-1-2 Initialize local-bus hard-disk controller.
3-2-1-3 Jump to UserPatch2.
3-2-2-1 Disable A20 address line.
3-2-2-3 Clear huge ES segment register.
3-2-3-1 Search for option ROMs.
3-2-3-3 Shadow option ROMs.
3-2-4-1 Set up Power Management.
3-2-4-3 Enable hardware interrupts.
3-3-1-1 Set time of day.
3-3-1-3 Check key lock.
3-3-3-1 Erase F2 prompt.
3-3-3-3 Scan for F2 key stroke.
3-3-4-1 Enter SETUP.
3-3-4-3 Clear in-POST flag.
3-4-1-1 Check for errors
3-4-1-3 POST done--prepare to boot operating system.
3-4-2-1 One beep.
3-4-2-3 Check password (optional).
3-4-3-1 Clear global descriptor table.
3-4-4-1 Clear parity checkers.
3-4-4-3 Clear screen (optional).
3-4-4-4 Check virus and backup reminders.
4-1-1-1 Try to boot with INT 19.
4-2-1-1 Interrupt handler error.
4-2-1-3 Unknown interrupt error.
4-2-2-1 Pending interrupt error.
4-2-2-3 Initialize option ROM error.
4-2-3-1 Shutdown error.
4-2-3-3 Extended Block Move.
4-2-4-1 Shutdown 10 error.
4-3-1-3 Initialize the chipset.
4-3-1-4 Initialize refresh counter.
4-3-2-1 Check for Forced Flash.
4-3-2-2 Check HW status of ROM.
4-3-2-3 BIOS ROM is OK.
4-3-2-4 Do a complete RAM test.
4-3-3-1 Do OEM initialization.
4-3-3-2 Initialize interrupt controller.
4-3-3-3 Read in bootstrap code.
4-3-3-4 Initialize all vectors.
4-3-4-1 Boot the Flash program.
4-3-4-2 Initialize the boot device.
4-3-4-3 Boot code was read OK.

Monday, 8 October 2012

Installing .net Framework 3.5 on Windows 8

The .NET Framework 4.5 is included with Windows 8 and installed on your computer with the operating system. However, the .NET Framework 3.5 is not automatically installed with Windows 8. To run applications that require the .NET Framework 3.5 on Windows 8, you must enable version 3.5 on your computer. There are two ways you can do this: by installing or running an application that requires the .NET Framework 3.5 (that is, by installing the .NET Framework 3.5 on demand), or by enabling the .NET Framework 3.5 in Control Panel. Both options require an Internet connection.

If an application requires the .NET Framework 3.5, but doesn't find that version enabled on your computer, it displays the following message box, either during installation, or when you run the application for the first time. In the message box, choose Install this feature to enable the .NET Framework 3.5. This option requires an Internet connection.


Prompt for installing the .NET Framework 3.5 on demand

You can also enable the .NET Framework 3.5 yourself through Control Panel. In Control Panel, choose Programs and Features, choose Turn Windows features on or off, and then select the Microsoft .NET Framework 3.5.1 check box. This option requires an Internet connection.


Turning Windows features on or off in Control Panel


If installing the .NET Framework 3.5 on demand or enabling it in Control Panel fails, you may get one of the following error messages:

0x800f0906: “Windows couldn't connect to the Internet to download necessary files. Make sure that you're connected to the Internet, and click Retry to try again.”

0x800F081F: “The changes could not be completed. Please reboot your computer and try again.”


These messages may be displayed for the following reasons:

Your computer is not connected to the Internet. Please connect, and then retry the operation.

If you cannot connect to the Internet, you can enable the .NET Framework 3.5 by using the Deployment Image Servicing and Management (DISM) command-line tool and specifying the installation media (ISO image or DVD) you installed Windows 8 from.

In Windows 8 or Windows Server 2012, open a Command Prompt window with administrative credentials (that is, choose Run as administrator).


To install the .NET Framework 3.5 from installation media located in the D:\sources\sxs directory, use the following command:

DISM /Online /Enable-Feature /FeatureName:NetFx3 /All /LimitAccess /Source:d:\sources\sxs

Use /All to enable all parent features of the .NET Framework 3.5.


Use /LimitAccess to prevent DISM from contacting Windows Update.


Use /Source to specify the location of the files needed to restore the feature.

For more information about DISM parameters and options, see How to Enable or Disable Windows Features


You are using a local source, but the network location is inaccessible or doesn’t have the right content. Install the .NET Framework 3.5 from installation media as described in the previous bullet point.


Your administrator has configured your computer to use Windows Server Update Services (WSUS) instead of Windows Update for servicing. Ask your administrator to enable the policy to use Windows Update instead of WSUS.

If these instructions do not correct the problem, download the paper Microsoft .NET Framework 3.5 Deployment Considerations from the Windows Dev Center for more extensive troubleshooting information.

Sunday, 29 July 2012

Install more than one OS on your PC

Dont worry friends if you cant install more than one Operating systems on your PC. Here is the solution for this. With the software GAG or Boot-US, you can install multiple OS on your computer.


GAG Boot menu


Boot-US screenshot


This creates MBR on different disks drives so that the partitions become bootable.

For more info goto www.infogallery.webs.com

Tuesday, 5 June 2012

Security Certificate Error

If you see a error while opening a website in your any browser displaying Security Certificate Error, Untrusted Website and more....Then it may cause by System Date. Make sure you have set the system's date to correct date else it will give you a security error cause this means, your certificate has been expired.

The error you see will look like this:-


Just Change the system's Date to correct date and the error will be removed...
for more PC Tricks goto www.infogallery.webs.com